Starting acrylic painting as a beginner can feel both exciting and overwhelming—but don’t worry, you’re not alone. I’ve been right where you are—staring at a blank canvas, unsure where to begin or what supplies to buy. That’s exactly why I created this step-by-step acrylic painting guide, crafted with beginners in mind. Whether you’re picking up a brush for the first time or returning to painting after a break, this guide will walk you through everything you need to know.
From setting up your painting space and choosing the right tools, to learning basic techniques like layering, dry brushing, and blending, you’ll find practical advice designed to help you feel confident and creative. We’ll also explore easy, beginner-friendly projects like abstract art, floral designs, and colorful landscapes to help you apply what you learn.
This guide is more than just a list of tips—it’s a roadmap to starting your acrylic painting journey with clarity and joy. No pressure for perfection—just permission to play, practice, and grow. Let’s dive in and turn that blank canvas into something beautiful!
1. How to Start Acrylic Painting Step by Step for Beginners:
Starting with acrylic painting can be fun and rewarding. Follow these easy steps to get started with confidence:
Step 1: Start with Research
Before buying supplies, spend some time understanding the basics of acrylic painting:
- Types of Acrylic Paint:
- Heavy-Body Paints: Thick, buttery texture, great for creating bold textures.
- Soft-Body/Fluid Acrylics: Smoother, for detailed work or watercolor-like effects.
- Inspiration & Learning:
- Watch YouTube tutorials or read art blogs.
- Follow artists on social media for motivation.
Step 2: Buy the Essential Tools
You don’t need to buy everything at once. Start with:
- Acrylic Paints: A basic set with primary colors (red, blue, yellow), black, and white.
- Brushes: Flat and round brushes in different sizes.
- Canvas or Acrylic Paper: Pre-stretched canvases or canvas boards are ideal for beginners.
- Palette: Use a plastic, glass, or disposable palette for mixing colors.
- Water Container & Paper Towels: For cleaning brushes and wiping spills.

Step 3: Set Up Your Workspace
Acrylic paints dry quickly, so having a comfortable, organized space makes a big difference:
- Lighting: Use natural light or a desk lamp for visibility.
- Table Protection: Cover your workspace with old newspapers or plastic sheets.
- Accessibility: Keep all tools within reach, including extra paper towels and water.
Step 4: Practice Basic Techniques
Start with simple techniques to build your skills:
- Dry Brushing: Use minimal paint on a dry brush for a scratchy, textured effect.
- Layering: Let each layer dry before applying the next to create depth and richness.
- Blending: Blend colors while still wet for smooth transitions (great for skies and water).
- Stippling: Dab the paint with a brush or sponge for a dotted texture (perfect for leaves or flowers).
Step 5: Study the Color Wheel & Mixing
Color mixing is key to making your paintings pop:
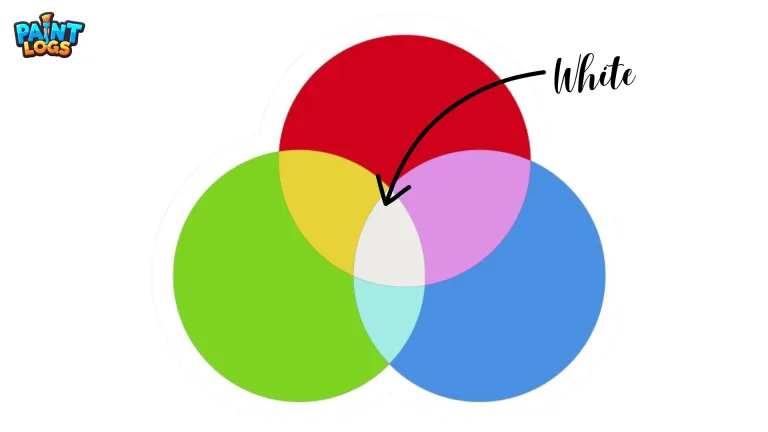
- Primary Colors: Red, blue, and yellow—mix these to create all other colors.
- Secondary Colors: Mix two primaries (red + yellow = orange).
- Complementary Colors: Colors opposite on the color wheel (blue & orange) create contrast.
- Tints & Shades: Add white for lighter tones (tints) and black for darker shades.
💡 Pro Tip: Acrylics dry slightly darker, so mix colors lighter than your target shade.

Step 6: Practice Brushwork
Brush control helps create detailed and expressive art:
- Brush Types: Use different brushes to explore their effects.
- Flat Brushes: Great for broad, bold strokes.
- Round Brushes: Perfect for details and thin lines.
- Fan Brushes: Create textures like grass or hair.
💡 Maintenance Tip: Wash brushes with water immediately after use to prevent paint from hardening.
Step 7: Explore Various Mediums & Textures
Acrylic paints are super versatile. Try:
- Gel Mediums: Add thickness for texture and 3D effects.
- Glazing Liquids: Extend drying time for smooth blending.
- Modeling Paste: Create raised, sculptural effects on the canvas.
- Household Tools: Use sponges, combs, or plastic cards for unique patterns.
Bonus Tips for Success:
- Practice Regularly: Even 10-15 minutes of daily practice will boost your skills.
- Stay Inspired: Join online art communities, visit galleries, and explore nature for ideas.
- Embrace Mistakes: Every painting teaches you something new—don’t fear making “bad” art!
2. What Do I Need to Buy to Start with Acrylic Paint?
1. Acrylic Paints
a. Starter Set
- Choose a basic set with primary colors (red, blue, yellow), black, and white.
b. Recommended Types
- Student-Grade Paints: Affordable and suitable for beginners (e.g., Liquitex Basics, Winsor & Newton Galeria).
- Artist-Grade Paints: Higher pigment quality but pricier, ideal for advanced projects.
💡 Tip: Use tubes for thicker applications and bottles for fluid techniques.
2. Paintbrushes
a. Essential Brushes
- Flat Brushes (Sizes 6 & 10): Great for backgrounds and large areas.
- Round Brushes (Sizes 1 & 2): Ideal for detailed work and fine lines.
- Filbert Brush (Size 4 or 6): Good for blending and soft edges.
- Fan Brush: Adds texture like grass or leaves.
b. Material
- Use synthetic brushes as they are durable and easy to clean.
3. Canvas or Painting Surface
a. Pre-Stretched Canvas
- Ready-to-use and perfect for finished art.
b. Canvas Boards
- Cheaper and easier to store.
c. Acrylic Paper
- Great for practice and affordable.
d. Wood Panels
- Long-lasting and ideal for advanced projects.
4. Palette
a. Types of Palettes
- Plastic or Glass Palette: Reusable and easy to clean.
- Disposable Palette Pads: Convenient for quick cleanup.
💡 Tip: Use a ceramic plate or even glass as a DIY palette.
5. Water Container
- Use an old mug or jar for rinsing brushes while painting.
6. Rags or Paper Towels
- Use old rags or paper towels to wipe brushes, control water, and clean spills.
7. Palette Knife (Optional)
a. Purpose
- Use for mixing paint and applying thick textures.
b. Recommended Shape
- A tapered or angled blade for versatility.
8. Gesso (Optional)
- Primes surfaces like canvas or wood, ensuring better paint adhesion.
9. Varnish (Optional)
- Gloss or Matte Finish: Protects and seals finished paintings.
10. Easel (Optional)
a. Tabletop Easel
- Great for small workspaces and portable setups.
b. Standing Easel
- Ideal for larger projects and better posture while painting.
11. Spray Bottle (Optional)
- Keeps paint wet and workable by misting water over the palette.
Beginner-Friendly Shopping Tips
a. Start Small
- Buy only essential supplies first and expand as you progress.
b. Look for Deals
- Many art stores offer beginner kits or seasonal sales.
c. Quality vs. Budget
- Invest in good-quality brushes and paints for better results.
With these essentials, you’ll be fully equipped to explore the exciting world of acrylic painting!
3. Acrylic Painting Techniques
Acrylic painting is versatile and offers numerous techniques to create stunning art. Here are essential methods to help beginners develop their skills:
1. Basic Techniques
a. Dry Brushing
- Use a dry brush with minimal paint for rough, textured strokes.
- Ideal for adding highlights or creating rough surfaces like wood or fabric.
b. Layering
- Apply paint in layers, letting each dry before adding the next.
- This creates depth and builds complexity in your painting.
c. Wet-on-Dry
- Paint wet acrylic over a dry base for crisp lines and defined shapes.
- Great for details and sharp edges.
d. Wet-on-Wet
- Paint wet acrylic onto a wet base for smooth blending and soft transitions.
- Perfect for skies, water, and gradients.

2. Advanced Techniques
a. Glazing
- Mix acrylic with glazing medium for transparent layers.
- Use this to adjust color tones without losing details.
b. Impasto
- Apply thick paint with a palette knife or brush for a textured, 3D effect.
- Works well for bold, expressive strokes.
c. Scumbling
- Use a dry brush with a small amount of paint and scrub over the surface.
- Creates a soft, cloudy texture, perfect for landscapes or backgrounds.
d. Splattering
- Flick paint from a brush or use a toothbrush for random splatter effects.
- Useful for creating stars, foliage, or abstract patterns.
3. Experimental Techniques
a. Stamping & Stenciling
- Use stamps or stencils for repeated patterns and consistent shapes.
b. Sponge Painting
- Dab paint with a sponge for soft textures or dappled effects.
c. Sgraffito
- Scratch into the wet paint to reveal the layer underneath.
d. Pouring
- Pour and tilt paint for fluid, abstract designs.
4. Color Mixing and Palette Management: Creating Your Perfect Hues
Mastering color mixing and managing your palette can elevate your acrylic painting skills.
1. Understanding Color Theory
- Primary Colors: Red, blue, yellow (can’t be created by mixing).
- Secondary Colors: Green, orange, purple (made by mixing two primaries).
- Tertiary Colors: Mix a primary with a secondary (e.g., red-orange).
2. Mixing Colors
a. Create Custom Colors
- Mix primary colors to create your desired shades.
- Add white for tints (lighter shades).
- Add black or a complementary color for shades (darker tones).
b. Practice Color Blending
- Blend directly on the palette or canvas for smooth transitions.
3. Palette Management
a. Setup Tips
- Use a flat palette with colors arranged around the edges.
- Leave the center for mixing.
b. Keep Paints Fresh
- Mist with water regularly to keep paints from drying out.
- Use a stay-wet palette if working on large projects.
4. Consistency and Texture
- Thin Paint: Add water for a watercolor-like effect.
- Thick Paint: Use straight from the tube for bold, textured strokes.
- Acrylic Mediums: Use gels or pastes to alter paint consistency and finish.
5. Experimentation & Practice
- Create a color chart by mixing different hues.
- Keep a color diary to track successful mixes.
- Practice makes perfect—explore and have fun!
By mastering these techniques and color-mixing strategies, you’ll unlock endless creative possibilities in acrylic painting. 🎨

5. Practical Projects for Beginners: Simple and Rewarding Acrylic Painting Ideas
Starting with beginner-friendly acrylic painting projects can boost your confidence and enhance your skills. Here are some creative ideas to explore:
1. Abstract Art
Abstract painting is perfect for beginners as it focuses on expression and creativity without strict rules.
Project Ideas:
- Geometric Shapes: Paint overlapping squares, circles, or triangles.
- Color Splashes: Use bold color splatters or brushstrokes.
- Textured Layers: Apply thick layers with a palette knife for a dynamic effect.
Why It’s Great:
- No specific subject to follow.
- Encourages experimentation with colors and textures.
2. Landscape Painting
Create simple landscapes like sunsets, beaches, or mountain scenes.
Project Ideas:
- Sunset Silhouettes: Paint a vibrant sunset with dark tree silhouettes.
- Seascapes: Create ocean waves using blues and whites.
- Meadows: Use green tones for grassy fields and add colorful flowers.
Why It’s Great:
- Teaches color blending, layering, and perspective.
- Helps develop composition skills.
3. Still Life Composition
Still life involves painting everyday objects like fruits, cups, or flowers arranged in a setup.
Project Ideas:
- Fruit Bowl: Paint apples, oranges, and bananas with shadows and highlights.
- Table Setting: Paint a cup of coffee with a book or vase.
- Kitchen Items: Try jars, utensils, or vegetables.
Why It’s Great:
- Develops observation, detail work, and light-shadow techniques.
4. Floral Designs
Painting flowers is enjoyable and forgiving due to their organic forms.
Project Ideas:
- Single Flower: Paint a close-up of a rose or sunflower.
- Floral Bouquet: Create a colorful bouquet in a vase.
- Wildflowers: Paint simple flowers in a field setting.
Why It’s Great:
- Easy to personalize with different colors and styles.
- Great for practicing fine details and petal textures.
5. Mixed Media Exploration
Combine acrylics with other materials for a unique art style.
Project Ideas:
- Collage Art: Use magazine cutouts and paint overlays.
- Ink & Acrylics: Create a watercolor effect with ink outlines.
- Textured Surfaces: Add sand, fabric, or paper to create mixed-media art.
Why It’s Great:
- Encourages creativity and exploration.
- Expands artistic techniques beyond traditional painting.
6. Tips for Success in Acrylic Painting
Acrylic painting is fun and creative. Follow these practical tips to make your painting journey smoother and more enjoyable.
1. Gather Your Supplies
Start with essential art materials to avoid interruptions:
- Acrylic Paints: Primary colors (red, blue, yellow), black, and white.
- Brushes: A mix of flat, round, and detail brushes for different strokes.
- Canvas or Paper: Pre-stretched canvas or acrylic-friendly paper.
- Palette and Water Container: For mixing colors and cleaning brushes.
- Rags or Paper Towels: To clean spills and excess paint.
Why It Matters:
Having everything ready helps you focus on your art without breaking the flow.
2. Set Up Your Workspace
Create a comfortable and inspiring space:
- Lighting: Use natural or bright artificial light.
- Surface: Choose a sturdy table or easel.
- Protection: Cover surfaces with old cloth or newspaper.
- Ventilation: Ensure good airflow if using mediums with strong odors.
Why It Matters:
A neat, well-lit area keeps you motivated and ensures a better painting experience.
3. Practice Basic Techniques
Start with simple painting methods:
- Dry Brushing: Use minimal paint for textured effects.
- Layering: Apply multiple paint layers for depth and dimension.
- Blending: Mix colors directly on the canvas for smooth transitions.
- Glazing: Use thinned paint for transparent effects.
Why It Matters:
Mastering techniques helps you create diverse and dynamic artworks.

4. Start Simple
Choose beginner-friendly projects:
- Abstract art with simple shapes.
- Basic landscapes with a few elements.
- Simple still-life objects like fruits or flowers.
Why It Matters:
Starting with simple projects builds confidence and helps you enjoy the creative process.
5. Experiment and Have Fun
Let your creativity run wild:
- Mix unusual colors.
- Use unconventional tools like sponges or palette knives.
- Try different strokes, patterns, and textures.
Why It Matters:
Art is about self-expression, so exploring different styles makes your work unique.
6. Clean Up
Keep your supplies in good condition:
- Brushes: Wash them thoroughly with water and mild soap after every use.
- Work Area: Wipe surfaces to avoid dried paint stains.
- Paint Storage: Close paint tubes securely to prevent drying.
Why It Matters:
Good maintenance keeps your tools functional and ready for the next session.
7. Keep Learning
Stay curious and keep improving:
- Watch tutorials or attend workshops.
- Read art books or join online forums.
- Try new projects to challenge yourself.
Why It Matters:
Continuous learning sharpens your skills and expands your creative potential.
Remember, practice is essential when it comes to acrylic painting. Don’t be afraid to experiment with various styles and techniques to discover your unique artistic voice. Each project you complete brings you one step closer to mastering your craft. We hope this guide inspires you to dive into the rewarding world of acrylic painting and encourages your continued creativity.
FAQs
What do beginners need for acrylic painting?
Beginners need essential supplies such as acrylic paints, brushes, a canvas or acrylic paper, a mixing palette, a palette knife, water for cleaning brushes, and a cloth or paper towel. A drop cloth can also protect your workspace.
Where to start with acrylic painting?
Start by setting up your workspace and gathering supplies. Practice basic techniques like brushstrokes and color mixing. Begin with simple projects such as landscapes or abstract designs.
Do we need to wet the brush before using acrylic paint?
It’s not required, but wetting the brush can help thin the paint and make it easier to apply. Avoid adding too much water to maintain the paint’s vibrancy and opacity.
Should I add water to acrylic paint?
Yes, adding water can thin the paint for transparent effects or smooth application. Be cautious, as too much water can reduce the paint’s intensity and adhesion.
Should I dip my brush in water before painting?
Dipping the brush in water can help when working with thick paint, ensuring smoother application. Just avoid soaking the brush, as it can dilute the paint excessively.
How long does acrylic paint take to dry?
Acrylic paint dries quickly, usually within 15 to 30 minutes, depending on layer thickness and environmental conditions like humidity and temperature.