Can You Paint Pressure Treated Wood?
Yes, you can paint pressure treated wood, but timing makes all the difference. Fresh lumber comes saturated with water and preservatives. If you rush the job, the paint won’t bond and will peel within months. Wait until the wood is dry, and the right paint system will protect it for years.
Painting pressure treated wood does more than add color. It shields against moisture, reduces surface cracks, and gives your project a polished look.
Whether you’re finishing a fence, deck, or pergola, this guide shows you when and how to get lasting results.
Why Homeowners Want to Paint Pressure Treated Wood
Pressure treated wood is everywhere — decks, fences, outdoor furniture. It’s affordable, strong, and resistant to rot and insects. But it doesn’t always look the way you want. The natural green or brown tint, combined with surface marks, can leave projects looking unfinished.
That’s where paint comes in. A quality coating transforms the look and helps protect the investment.
The catch? Paint only works if applied at the right time, with the right preparation. Too early, and the paint will fail. Too late, and the wood may already show cracks or fading.
This guide will cover:
- What makes pressure treated wood different from standard lumber
- How long to wait before painting or staining
- Step-by-step instructions for cleaning, priming, and painting
- Risks of rushing the process
- When stain or sealer may be a better choice
Ready to find out if your wood is paint-ready? Let’s start by understanding how pressure treated lumber works.

Understanding Pressure Treated Wood
Pressure treated wood is regular lumber that has been infused with chemical preservatives under high pressure. This process forces treatment deep into the fibers, giving the wood resistance against rot, fungi, and insects. That’s why it’s the go-to choice for decks, fences, garden boxes, and other outdoor projects.
How to Recognize Pressure Treated Wood
- Color: Most pieces have a greenish or brownish tint. Some newer treatments leave a lighter, natural look.
- Incisions: Many boards have small slits or perforations. These help the chemicals penetrate deeper.
- Tags or Stamps: Lumberyards usually mark pieces as “pressure treated” or “PT.” Look for these before you buy.
Why It’s Different to Paint
Fresh from the mill, pressure treated lumber is wet — sometimes heavy enough to drip. That excess moisture slows down the drying process and makes it difficult for paint or stain to soak in. If you apply a coating too soon, it sits on the surface instead of bonding. The result is peeling, blistering, and wasted effort.
What About Kiln-Dried After Treatment (KDAT)?
Not all treated lumber is the same. Kiln-dried after treatment wood goes through an additional drying step after the chemicals are added. This removes most of the moisture, so KDAT boards can be painted or stained much sooner — sometimes right away. If you need to finish a project quickly, KDAT is a smart option.
Knowing what type of pressure treated wood you have is the first step to planning a paint job that lasts. The next question: how long should you wait before painting?
When Can You Paint Pressure Treated Wood?
The biggest mistake homeowners make is painting too soon. Pressure treated lumber is full of water and preservatives when it leaves the mill. Until that extra moisture evaporates, no finish will bond properly.
Traditionally, experts recommended waiting 3 to 6 months before painting or staining. This gave the wood time to dry naturally. But newer treatments — like those from Culpeper Wood Preservers — can sometimes be sealed within 30 days, depending on conditions.
Several factors affect drying time:
- Climate: Hot, dry climates dry lumber faster. Humid or rainy areas slow the process.
- Wood size: Thicker posts take longer to dry than thinner deck boards.
- Storage: Lumber stacked tightly with poor airflow stays damp longer.
- KDAT lumber: Kiln-dried after treatment boards are the exception. These are ready to finish almost immediately.
The key is not the calendar, but the moisture level.
Testing Wood Moisture Content
You don’t have to guess whether your wood is ready. Two simple tests tell the story:
- Water drop test: Sprinkle a few drops of water on the surface.
- If it beads up, the wood is still too wet.
- If it soaks in, the wood is ready for primer and paint.
- Moisture meter: For more accuracy, use a handheld meter. Paint and stain bond best when the reading is below 19%. Deck professionals often aim for 12–16% before staining.
Both methods are easy, inexpensive ways to avoid wasting time and money on a job that won’t last.
Weather Conditions Matter
Even if your wood is dry enough, the weather can make or break your project.
- Avoid painting in direct hot sun — it causes paint to dry too quickly and crack.
- Skip days with high humidity or rain in the forecast. Moisture interferes with curing.
- Ideal times are mild, dry spring or fall days with temps between 50°F and 85°F.
- Decks need extra care: avoid painting horizontal walking surfaces. They trap water, wear fast, and become slippery.
Waiting for the right conditions ensures your paint bonds well and cures evenly.

Risks of Painting Too Soon
Painting pressure treated wood before it dries leads to problems that show up fast. Many homeowners learn the hard way that rushing costs more in the long run.
Poor Adhesion and Peeling
When wood is still damp, paint cannot soak into the fibers. Instead, it forms a skin on the surface. As the lumber dries and shrinks, that paint cracks, blisters, and peels. You may find yourself scraping it all off within a year.
Warping and Cracking
Fresh treated boards contain both water and preservatives. As moisture leaves, boards twist, cup, or crack. If paint is already sealing the surface, these movements break the bond. That’s why you see deck rails or fence posts with split paint and exposed patches.
Paint That Won’t Cure
Moisture trapped under the coating prevents paint from fully drying. Surfaces may feel sticky or soft weeks after application. Dirt sticks, footprints show, and the finish wears unevenly.
Premature Failure and Rework
Redoing a paint job costs time and money. You may need to strip, sand, clean, and repaint long before expected. A project meant to last 5–7 years may fail in less than one.
Myth Bust: Rot From “Trapped Water”
Some believe that painting wet wood causes it to rot from the inside out. That’s not true. Pressure treated wood resists rot even when wet. The real issue is paint failure, not hidden decay.
What Should Never Be Done With Pressure Treated Wood
- Never burn it. The preservatives release toxic fumes.
- Don’t paint or stain too soon. Moisture must escape first.
- Don’t skip primer. Paint will not stick directly to raw treated wood.
Waiting until the lumber is ready avoids all these headaches. Once it’s dry, you can move to the step-by-step process for painting it right.

Step-by-Step Painting Guide
Painting pressure treated wood works best when you follow a clear process. Skipping steps leads to peeling or wasted effort. Here’s how to do it right.
1. Prep and Protect Surroundings
Start by clearing the area. Move furniture, grills, or decorations. Cover plants, grass, and HVAC units with tarps or plastic sheets.
Gather your tools:
- Stiff brush or broom
- Roller or paint sprayer
- Quality paint brushes for detail work
- Drop cloths and painter’s tape
- Safety gear: goggles, gloves, long sleeves
Good prep saves cleanup time and protects surfaces you don’t want coated.
2. Clean the Wood Thoroughly
Pressure treated wood sitting outside collects dirt and mildew. Clean it before painting.
Options:
- Sweep or brush off debris.
- Scrub with a solution of water and trisodium phosphate (TSP) or a deck cleaner.
- Use a pressure washer on a low setting — keep the nozzle moving to avoid gouging the wood.
Let the wood dry completely after washing. Painting over damp wood cancels out all your work.
3. Prime the Surface
Primer is what makes paint stick to treated wood. Apply an exterior latex primer made for pressure treated lumber.
Tips:
- Coat all surfaces evenly.
- Don’t forget cut ends — they absorb moisture quickly.
- For certain projects, an alkyd oil-based primer is also acceptable, but most pros prefer latex for flexibility.
Give primer enough drying time as recommended on the label.
4. Apply Your Paint
Choose a high-quality exterior latex or acrylic paint. Avoid oil-based paints, which can trap moisture.
- Apply in two thin coats rather than one thick coat.
- Follow the wood grain for even coverage.
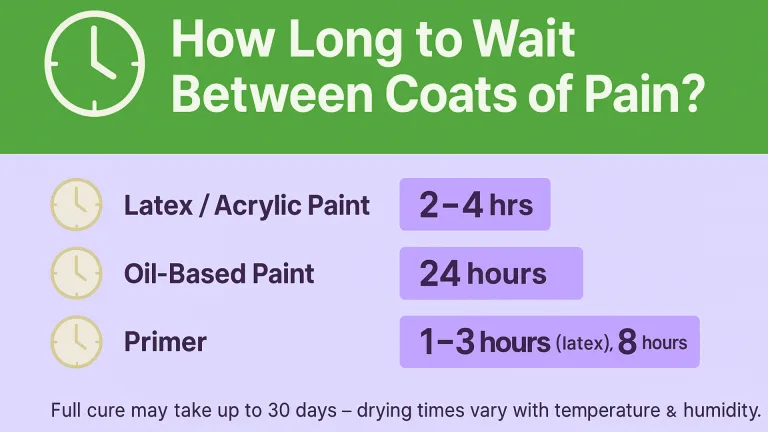
- Allow full drying time between coats.
- Do not paint horizontal deck floors. Paint can become dangerously slippery and wear out quickly. Instead, use a solid deck stain designed for foot traffic.
Once finished, let the surface cure fully before heavy use.

Paint vs. Stain vs. Sealer: Making the Right Choice
Pressure treated wood doesn’t have just one finishing option. You can paint it, stain it, or seal it — each gives a different look and level of upkeep. The right choice depends on your goals.
Paint
- Look: Covers the wood completely. Hides grain and color variations.
- Best for: Railings, trim, fences where you want solid color.
- Drawbacks: High maintenance. Paint chips, peels, and requires scraping before recoating.
- Tip: Never use paint on deck flooring — it becomes slick and wears fast.
Stain
- Look: Lets grain show. Options range from semi-transparent to solid.
- Best for: Decks, fences, outdoor furniture.
- Pros: Easier to refresh than paint. Fades gradually instead of peeling.
- Colors: Wide range available, including black stain for pressure treated wood or tones that make pine look like cedar.
- Timing: Wait until wood is dry (water-drop test or 15–19% moisture level).
Sealer
- Look: Clear or lightly tinted. Keeps a natural appearance.
- Best for: Showcasing wood’s original look while protecting it.
- Pros: Repels water, reduces cracking, adds UV resistance.
- Drawbacks: Shorter lifespan. Needs reapplication every 1–2 years.
Quick Comparison
| Finish | Appearance | Durability | Maintenance | Best Use |
|---|---|---|---|---|
| Paint | Solid color, hides grain | 5–7 years | Scrape + repaint | Railings, trim |
| Stain | Grain visible, color options | 2–3 years | Recoat, no scraping | Decks, fences |
| Sealer | Natural, clear look | 1–2 years | Reapply often | Wood with natural appeal |
Choosing between them comes down to how much effort you want for upkeep and how you want the finished wood to look.
Can You Stain Pressure Treated Wood?
Yes, you can stain pressure treated wood — and many homeowners prefer it over paint.
Staining pressure treated wood lets the natural grain show while adding color and protection against sun, rain, and mildew. It keeps decks, fences, and outdoor furniture looking fresh without the peeling problems paint often brings.
Before staining, make sure the lumber is fully dry. Use the water-drop test or a moisture meter. Stain bonds best when moisture levels are below 15–19%.
You have several choices:
- Semi-transparent stain for a natural look.
- Solid stain for bold color and stronger coverage.
- Specialty finishes such as black stain for pressure treated wood or tones that mimic cedar.
Oil-based stains soak deep into the wood, offering durable protection, but they dry more slowly. Water-based stains are easier to apply, quick to clean, and better for DIY projects.
Plan on restaining every 2–3 years to keep the wood protected and the finish looking sharp.
| Type of Stain | Pros | Cons | Best Use |
|---|---|---|---|
| Oil-based | Deep penetration, long-lasting protection | Slower drying, stronger odor, harder cleanup | High-traffic decks, exposed fences |
| Water-based | Easy to apply, dries quickly, simple cleanup | Doesn’t penetrate as deeply, may need more frequent recoats | DIY projects, low-maintenance outdoor furniture |
| Solid stain | Bold color, excellent UV protection | Hides most of the wood grain | Large surfaces where uniform look is desired |

Related reading: How to stain bricks
Maintenance & Recoating
No finish lasts forever on pressure treated wood. Paint, stain, and sealers each have different lifespans and maintenance needs. Knowing what to expect saves time and prevents early failure.
How Long Finishes Last
- Paint: Typically 5–7 years before peeling or fading.
- Stain: About 2–3 years, depending on sun and weather exposure.
- Sealer: 1–2 years, since clear coatings wear down faster.
Signs It’s Time to Refresh
- Paint: Peeling, cracking, or bubbling.
- Stain: Fading color, patchy absorption, or worn spots.
- Sealer: Water no longer beads on the surface during the water-drop test.
Why Regular Upkeep Matters
If you skip maintenance, pressure treated wood weathers to a dull gray. It can also develop surface cracks that invite more moisture. Leaving it untreated doesn’t cause immediate rot, but it shortens the wood’s usable life.
Recoating Tips
- Clean the surface before applying new product.
- Lightly sand rough or peeling areas for better adhesion.
- Stick with the same type of product (paint, stain, or sealer) unless you’re willing to strip everything first.
- Plan for warm, dry weather with no rain in the forecast.
Routine recoating is what keeps decks, fences, and outdoor structures looking sharp and lasting longer.
Conclusion: Can You Paint Pressure Treated Wood?
Yes — you can paint pressure treated wood. The key is patience. Let the wood dry, test it with the water-drop method or a moisture meter, and only move forward when it’s ready.
When prepped, primed, and painted correctly, treated lumber not only looks better but also lasts longer against weather and wear. If you’d rather avoid trial and error, a professional painter can handle the timing, products, and application for you.
Your outdoor wood surfaces deserve a finish that protects and enhances for years to come.
Get Professional Results with Expert Painters
Painting or staining pressure treated wood takes more than just picking up a brush. Timing, moisture testing, and the right products make the difference between a finish that lasts years and one that fails in months.
Hiring a professional ensures:
- Accurate moisture checks before painting or staining
- Use of primers and paints made for treated lumber
- Even application for long-lasting results
- Warrantied work that protects your investment
Durable, Warrantied Painting Services
A professional crew understands how to handle treated lumber in different climates. They prepare surfaces properly, choose high-quality exterior coatings, and guarantee durability.
Contact Us Today
Ready to transform your deck, fence, or outdoor structure? Call today to schedule your free estimate.
FAQ
How long should you wait before painting pressure treated wood?
Most boards need 4–6 months to dry before painting. Do the water-drop test: if water beads on the surface, keep waiting. For kiln-dried after treatment (KDAT) wood, you can paint much sooner.
What happens if you paint pressure treated wood too soon?
The paint won’t bond properly. You’ll see peeling, blistering, and cracks as trapped moisture escapes. This usually means stripping and redoing the job.
What type of paint works best on pressure treated wood?
High-quality exterior latex (water-based) paint is the safest choice. It adheres well to treated lumber and allows moisture to escape. Avoid oil-based paints, which can trap water.
Can you stain treated wood instead of painting?
Yes. Staining is often easier to maintain. Semi-transparent or solid stains highlight the grain while adding color. You’ll need to restain every 2–3 years, but it requires less prep than repainting.
What happens if you stain treated wood too soon?
The stain won’t soak in. It will sit on the surface, dry unevenly, and peel quickly. Always check with a moisture meter or water test before applying stain.
What happens if you don’t stain pressure treated wood?
It won’t rot right away, but it will fade to gray, crack, and become rougher over time. Stain or sealer helps preserve appearance and slows down wear.
Is it better to stain or seal pressure treated wood?
Sealant protects the wood while keeping its natural look, but it fades faster. Stain adds color and protection. Choose stain if you want long-term color and grain visibility, or sealer if you prefer a natural finish.
Can you sand pressure treated wood before finishing?
Yes. Light sanding helps remove mill glaze and smooths the surface. Don’t over-sand, since you can reduce stain absorption. Always wear protection when sanding treated wood.
Is it a good idea to stain pressure treated wood?
Yes. Staining protects against moisture, UV rays, and surface wear. It also gives you options like cedar tones or darker finishes for style.
What should never be done with pressure treated wood?
Never burn it — the chemicals release toxic fumes. Don’t use it for indoor food prep surfaces or compost bins. Always dispose of scraps properly.
How long do you have to wait before you can stain pressure treated wood?
Wait until moisture content is below 15%. Depending on climate, this can take weeks or months. KDAT wood can be stained much sooner.


