
How to Clean Intricate Carved Wood Doors Without Damaging Detailed Craftsmanship
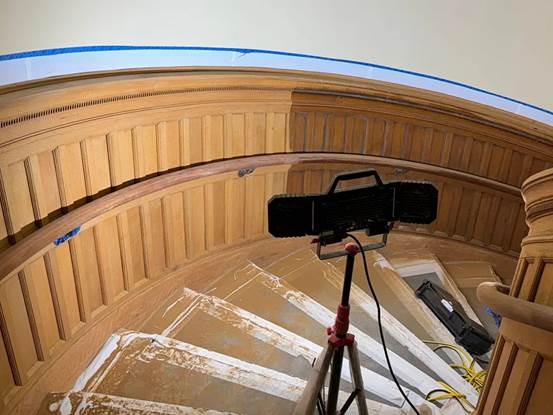
A carved wood door is one of the hardest objects a restorer can clean, because the value sits in the detail. Bevels, undercuts, gilded highlights, and sometimes layers of original polychrome paint all demand a method that removes grime without removing the carving itself. For heritage workshops facing this problem, pulse Laser cleaning is increasingly the method of choice — not because it is new, but because it is selective. Unlike blasting or chemicals, a pulsed beam can be tuned to lift only the soiling and leave the substrate beneath. This article takes a different route from a step-by-step manual: it walks through five real carved-door situations and shows, case by case, where laser helps, where it must defer to a conservator, and why the physics makes the difference.
Why bulk methods fail on carved wood
Carved wood punishes bulk methods, and it does so invisibly until the damage is done. Abrasive blasting rounds the crisp edges of a relief and strips gold leaf along with the dirt — a loss that no second pass can undo. Solvents can swell and cloud an original varnish, and on gilding the bole beneath the leaf is water-sensitive, so any damp method risks loosening the gold from its ground. Water drawn into a centuries-old softwood can raise the grain and open hairline cracks that a dry method would have respected. Each of these failures shares one cause: the method cannot tell the carving from the contamination. The laser’s advantage is not that it is powerful but that it is narrow — it touches only the layer the pulse is set to touch.
Scenario 1: a gilded church or civic door
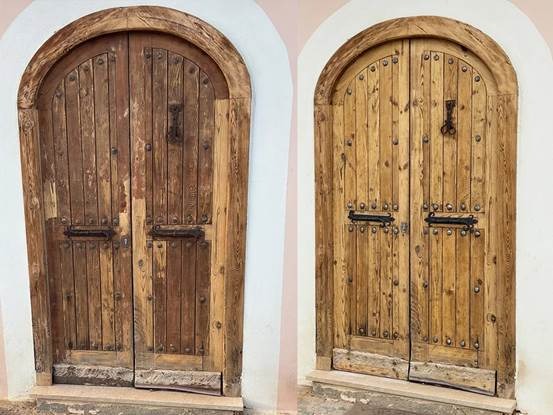
The classic case is a gilded door on a historic church, cathedral, or town hall. The surface is gold leaf laid over a red or brown bole on a gesso ground. The leaf itself is measured in microns, and the bole is the fragile layer that holds it. At the 1064 nanometer wavelength used by most pulsed cleaning sources, gold is highly reflective, so the beam tends to glance off the leaf while the darker, absorbing grime and degraded varnish above it take the energy. That optical contrast is what makes selective cleaning possible: you clean down to the leaf, not through it.
The operator works at low fluence, watching the grime turn to a fine ash while the gold stays bright. The test patch matters on gilded work more than anywhere else: a spot behind the hinge, invisible when the door is hung, is where the first settings are proven, because a misjudged fluence there costs nothing visible and teaches everything. Once the safe setting is found, the operator sweeps the beam in overlapping passes, letting the leaf emerge rather than forcing it. What “clean to the leaf” looks like in practice is a surface where the grime is gone but the bole — the coloured ground — is untouched and the gold reads as continuous, not pitted.
Source stability is the whole game here. If the pulse energy drifts upward during a long session on a tall door, a setting that was safe at nine in the morning can drift into a scorching one by lunch, and gold does not forgive a second chance. A MOPA-style source holding its drift under about three percent keeps that window where it was set, which is why stability matters more than peak watts on gilded work. A conservator would rather have a modest, predictable source than a powerful, wandering one.
Scenario 2: a polychrome heritage door
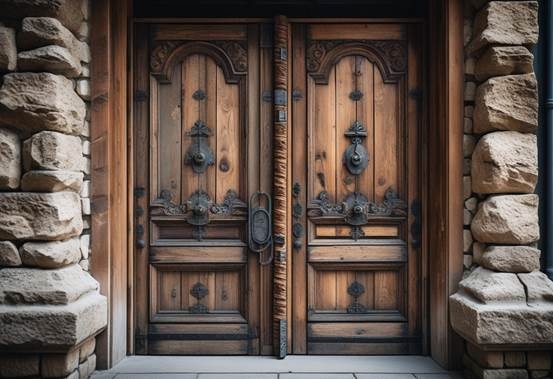
Some doors carry painted decoration — polychrome — where an original artisan applied mineral or plant pigments over a prepared ground. These layers are more varied than gilding and therefore less predictable. A dark pigment couples to the beam and lifts readily; a light or white pigment may reflect more and need a slightly higher setting. The real danger is over-cleaning: removing a later over-paint is often acceptable, but removing the original polychrome is not, because that layer is the art.
A skilled operator reads the surface area by area, adjusting fluence as the color changes, and stops at the layer that is historically correct to keep. The give-away is the plume and the sound: a later over-paint often lifts as a loose flake or a dull grey cloud, while original polychrome tends to come off as a thinner, more coloured wisp, and the operator learns to read both. On a door where a 19th-century repaint covers a 17th-century original, the brief is usually to remove the later layer and reveal — but not disturb — the earlier one, and the pulse width is the dial that separates them.
The laser’s digital, setting-driven nature helps here because the exact parameters used on one panel can be recorded and matched on the next, giving a consistent result across a door rather than a patchwork of over- and under-cleaned sections. On a polychrome door, consistency is the craft: a visitor should not be able to tell, by brightness alone, where one session ended and the next began.
Scenario 3: a weathered softwood cottage or barn door
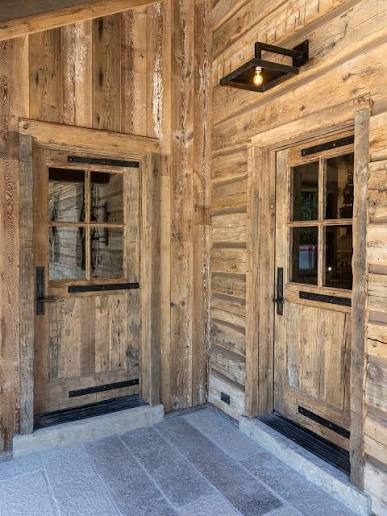
A plain weathered cottage or barn door looks simpler but hides a different risk. Softwoods such as pine, fir, or limewood char easily if the fluence is too high, and a carved softwood door has thin sections — feather-edged mouldings, delicate tracery — where heat concentrates. The usual goal is to remove grey weathering, moss film, and old wax rather than paint. The grey layer is weathered lignin, not a coating, so it lifts as a pale dust rather than a flake, and the operator watches for the moment the wood’s own colour returns. Old wax sits differently — it can smear under the beam if the pulse is too long, so a shorter pulse with a controlled rate is the trick, lifting the wax before it melts into the grain.
Here the operator walks the setting down on a hidden test patch, behind a hinge or inside a recess, until only the grey surface lifts and the sound wood shows. On a carved softwood door, that test patch is also a lesson in geometry: the beam reaches a flat face at one angle and an undercut at another, and the fluence the face tolerates may scorch the undercut, so the operator sweeps with the relief in mind, not the panel.
Patience beats power. A lower-power air-cooled laser cleaner unit detuned to the low end of its range is safer on softwood than a high-power machine you must fight to gentle down. The point is control, not watts: a softwood door rewards the operator who treats it as fragile, and punishes the one who treats it as steel.
Scenario 4: an oak paneled door with degraded varnish
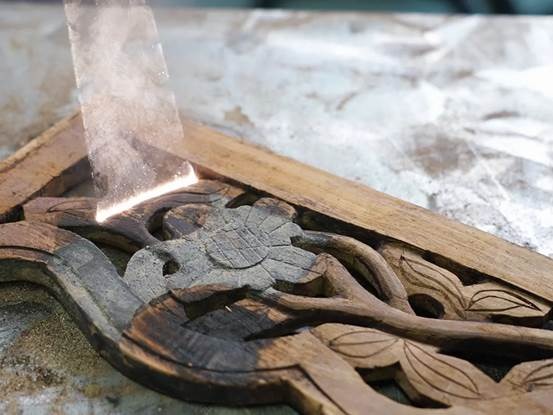
Hardwood doors, typically oak, present the opposite challenge. Oak is denser and tolerates a bit more energy, but it often carries fine cracks and raised grain from past moisture, plus original varnish that has gone brittle with age. The beam can lift the degraded varnish cleanly, but if the operator is not careful the edges of a crack can darken. The technique is to scan with a slightly defocused spot and let multiple low-energy passes do the work rather than one aggressive pass. The defocus spreads the energy so no single point takes the full hit, which is exactly what a cracked, brittle surface needs. Where a crack runs through a carved bead, the operator may clean the bead in short strokes parallel to the grain rather than across it, so the beam never sits on the weak line longer than it must.
The selectivity again protects the wood: there is no solvent to seep into a crack and no abrasive to wedge into the grain. On oak, the discipline is restraint — accept that a brittle varnish may need several gentle passes, and resist the urge to force it in one. The carving survives precisely because the method removes only what absorbs the pulse, and on a hardwood door the reward for patience is a surface that looks cared for rather than scraped.
Scenario 5: a door still hung in a historic building
Many carved doors are not in a workshop. They are still hung in a church, a town hall, or a listed home, and removing them is impractical or forbidden. This is where portability decides the method. A compact air-cooled pulsed unit on a small cart reaches the door in situ, needs no chiller and therefore no water line near a historic floor, and runs quietly enough to work around occupants.
Assemblers who build such air-cooled hand-held pulsed cleaners around a stable sourced MOPA module — YIHAI is one example — are effectively offering a field tool rather than a bench tool: a beam you bring to the gilding instead of the gilding to the beam. The air-cooled design matters here for a reason beyond convenience: with no chiller there is no water line to run across a historic floor, and no risk of a leak near centuries-old timber, which is a real concern when a water-cooled cabinet would demand plumbing through a listed interior. For a conservator, that in-situ capability is often the difference between treating the door and leaving it to worsen, because the alternative — lift a centuries-old door out of its frame — is rarely on the table.
The fluence window that ties the cases together
What links all five scenarios is the fluence window: the narrow band of energy per unit area where the unwanted layer absorbs the pulse and the wanted layer does not. Wood is organic and will char above that window, so the operator works at the low edge and confirms on a test patch before trusting it on visible carving. The window is narrow on softwood and a little wider on dense hardwood, but it is never wide, which is the first thing a new operator must respect.
Repetition rate and pulse width are the other two dials. A shorter pulse dumps its energy before the heat can spread into the substrate, which is why nanosecond pulses suit fragile soiling; a longer pulse starts to heat the wood and risks the char the method exists to avoid. A controlled repetition rate lets the surface cool between hits, so the operator is not stacking heat into a thin moulding. These three dials — fluence, pulse width, repetition rate — are the whole technique, and learning to read a surface well enough to set them is the skill that separates a conservator from an operator who merely points a machine.
A MOPA-style source that holds its drift under about three percent keeps that window stable across a whole session, which is why source stability is a specification that matters more than peak power for heritage work. These are physics, not marketing, and they are the reason the method can be trusted on irreplaceable surfaces where a mistake is permanent.
A three-question pre-check before the first pulse
Before any pulse lands, a conservator asks three questions. First, what is the substrate — softwood, hardwood, or a mix — because that sets the safe fluence ceiling. Second, what finishes are present — gilding, polychrome, varnish, wax, or later over-paint — because each couples to the beam differently and some must be protected rather than removed. Third, what is the condition of the surface itself — sound, flaking, or rotting — because the answer decides whether laser is even the right tool.
This pre-check takes minutes and prevents most of the failures that give laser a bad name when used carelessly. It is not bureaucracy; it is the difference between a reversible cleaning and an irreversible one. A door that fails the third question — flaking, rot, infestation — is not a laser job yet, and forcing it is how a tool with a good reputation earns a bad one. The pre-check also tells the operator which of the five scenarios they are in, and therefore which dials to reach for first.
When not to point a laser at it
Laser is not always right, and stating that plainly is part of using the tool responsibly. If the gilding or paint is already flaking, the priority is consolidation, not cleaning; a beam will not re-stick loose leaf, and the vibration of a pulse can worsen it. If the wood shows rot or active infestation, the structural problem comes first, and a conservator or specialist must direct the work before any surface treatment. If a door carries uncertain historic layers whose value is unknown, the safe move is analysis and a small documented test patch, not a full pass.
The method earns trust by knowing when to step back. A restorer who reaches for the laser on every door is using it as a shortcut; a restorer who reaches for it only where selectivity is the deciding factor is using it as a craft.
What to look for in a pulsed unit for heritage wood
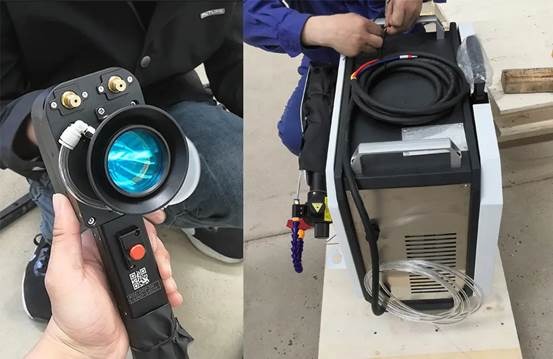
For carved wood, the specification that matters is fine control at the low end, not maximum power. Look for a source that holds stable parameters across a session, a spot size small enough to reach into relief and undercuts, and a hand-held air-cooled head light enough to hold steady on a vertical surface for hours. Portability without a chiller matters for in-situ work, and local extraction at the head keeps the fine plume from settling back on the carving you just cleaned.
None of this requires the biggest machine on the market; it requires the most controllable one. A unit that lets an operator walk the fluence down to the safe edge and trust it to stay there will outperform a high-power machine that can only be aimed. For heritage wood, the head weight decides how long a person can work accurately: a head in the low single kilograms held at arm’s height on a tall door is sustainable for a session, while a heavy head invites the fatigue that leads to a stray pulse on a vulnerable edge. The extractor at the head is not optional either — the fine plume from a carved surface settles back into the relief if it is not captured at source, and re-cleaning a relief you just cleaned is wasted, risky work.
Documenting the intervention
Because heritage work must be reversible and defensible, record the fluence, pulse width, repetition rate, and number of passes used on each area, plus a note of what layer was removed. The laser’s setting-driven nature makes this straightforward: the parameters are the record. A future conservator can read the file and repeat or adjust the work safely, which is exactly the standard any responsible intervention should meet. The beam that cleaned the door also wrote the manual for the next person who touches it.