If you’ve ever patched nail holes or filled dents in a wall, you already know that spackle is a handy lifesaver. What most people don’t realize, though, is that drying time can make or break the finished result. Everyone eventually asks the same thing: how can I make drying spackle faster?
Getting spackle to dry quickly and properly means you can sand, paint, and move on with your project without waiting around all day. But rushing it too much can cause cracks, peeling paint, or soft spots that never harden right.
If you’re planning to repaint afterward, it’s also worth knowing how long to wait between coats of paint to get a smooth, even finish.
In this guide, we’ll look at how long spackle actually takes to dry, what affects that timing, and the best tricks to speed things up safely.
What Is Spackle and Why Drying Time Matters
Spackle (also called spackling paste) is the smooth, putty-like compound you use to fill small holes, scratches, or dents before painting. It’s an essential step in most interior painting projects since it helps walls look freshly finished and free of dents.
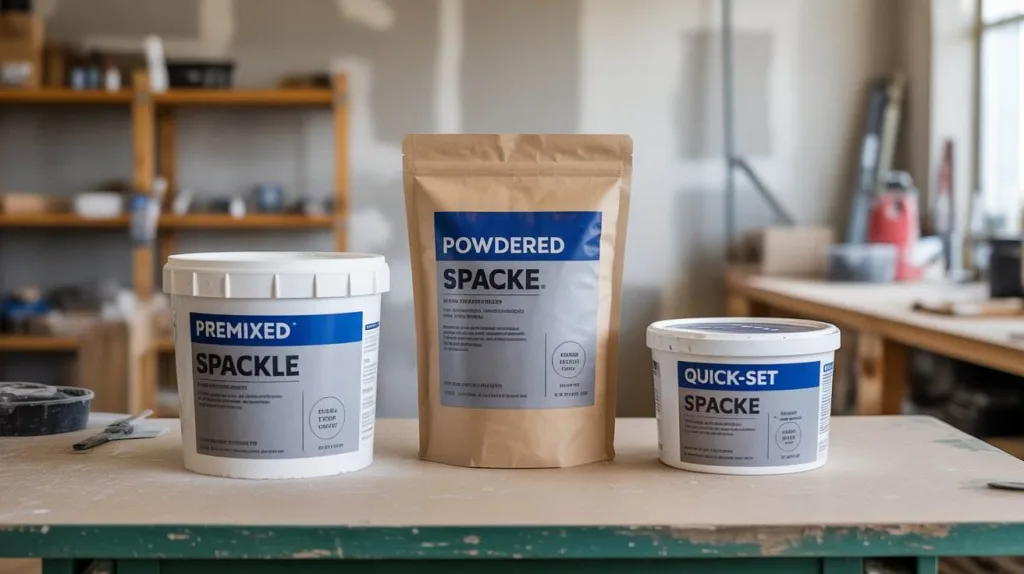
It usually comes in three forms:
- Premixed spackle: ready to use straight from the tub, perfect for quick fixes but slower to dry.
- Powdered spackle: a dry mix that you blend with water; you can control consistency for faster or slower drying.
- Quick-set spackle: chemically designed to harden fast, sometimes in as little as five minutes.
The way it dries determines how strong and durable the repair will be. When cured correctly, spackle dries hard, creating a smooth surface that blends into the wall. If it dries unevenly or too quickly, it can crumble or shrink later.
You also want to protect unused material. Once opened, tubs of spackle can start drying out from air exposure, leaving you with a useless, crusty lump. Keep lids tight, store in a cool spot, and add a small layer of plastic wrap under the lid if you plan to use it again soon.
How Long Does Spackle Take to Dry?
The honest answer: it depends. On average, lightweight formulas dry within 30 minutes to 1 hour for shallow repairs, while vinyl or acrylic types can need three to five hours. Premixed spackle the most common household type can take a full 24 hours to cure completely.
If you’re in a hurry, quick-set spackle is your friend. Some professional-grade options like Durabond 5 or 20 start to harden in five to twenty minutes. Brands such as 3M spackle and DAP Fast Dry also advertise shorter curing times.
Once it’s dry, you can move on to sanding and painting just like when estimating how long it takes to paint a room.
Certain products even show you when they’re ready. With pink spackle, the bright color fades to white once it’s dry enough to sand or paint no guesswork needed.
Environmental conditions make a big difference, too. A thin coat in a warm, dry room dry within the hour, while a thicker patch in a damp basement could take all night. Thin layers almost always dry faster and more evenly than one heavy blob, so it’s better to build up two light coats than one thick one.
What Affects Spackle Drying Speed
Thickness of application. The thicker the layer, the slower the spackle dry time. A skim over a nail hole can dry in 20–30 minutes; a deep gouge may need all day.
Type of spackle.
- Premixed spackle: slower but easier for beginners.
- Powdered spackle: mix it thin for faster evaporation.
- Quick-set spackle: cures chemically and is the fastest option when you’re racing the clock.
Humidity and temperature. Moist air slows evaporation; warm, dry air speeds it up. Using a small heater or dehumidifier nearby can cut total spackle drying time dramatically. Proper airflow and ventilation, similar to what you’d practice for paint fumes safety and ventilation can make a huge difference in drying time.
Airflow. A gentle fan moving air across the wall helps moisture escape more efficiently than direct heat alone.
Surface type. Drywall and other porous materials absorb some of the spackle’s moisture, which helps it set. Painted or glossy surfaces reflect moisture back, extending drying time.

How Long to Wait Before Sanding or Painting
After applying spackle, the biggest question is how long you need to wait before moving on to sanding or painting. The temptation to rush is real but timing is everything if you want a smooth, professional-looking finish.
For most lightweight and vinyl formulas, it’s safe to sand after about one to five hours, depending on how thick your patch is and how well your room is ventilated. Always check the product label some brands dry faster than others.
If you’re using quick-set spackle, you might be ready to sand in as little as 20 to 30 minutes. But don’t rely solely on the clock press lightly on the surface. If it feels firm and no longer cool or tacky, you’re good to go.
When it comes to painting, it’s better to wait a bit longer. Think of it like applying multiple coats timing matters, just as it does when you’re deciding how long to wait between coats of paint.
Even if the surface looks dry, internal moisture can still interfere with adhesion. How long to let spackle dry before painting usually depends on the brand and conditions, but 24 hours is a reliable rule of thumb.
Painting over damp spackle can lead to:
- Bubbles and peeling later on
- Uneven texture and color blotching
- Paint that never fully adheres
Think of it this way: a few extra hours of patience now can save you from redoing the entire wall later.
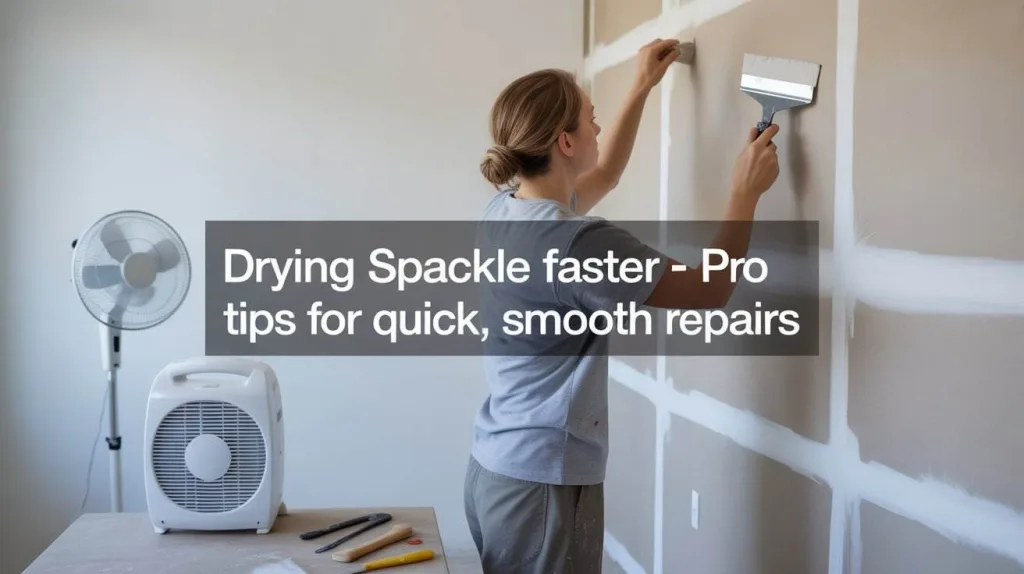
Proven Ways to Make Spackle Dry Faster
Here’s the section everyone’s been waiting for how to dry spackle faster without ruining the finish. These are tested tips from contractors, DIYers, and even Reddit users who’ve spent years patching walls.
Apply Thin Layers
It might sound obvious, but the single biggest mistake people make is slathering on too much at once. A thick layer traps moisture inside, making the top crusty while the middle stays soft. Instead, apply thin, even coats. Once the first layer is dry, sand it lightly and apply the next.
Improve Airflow
Air movement is your friend. Set up a fan so that it gently blows across the wall, not directly into the patch. Consistent airflow helps evaporate moisture evenly, reducing spackle dry time without causing cracks or ridges.
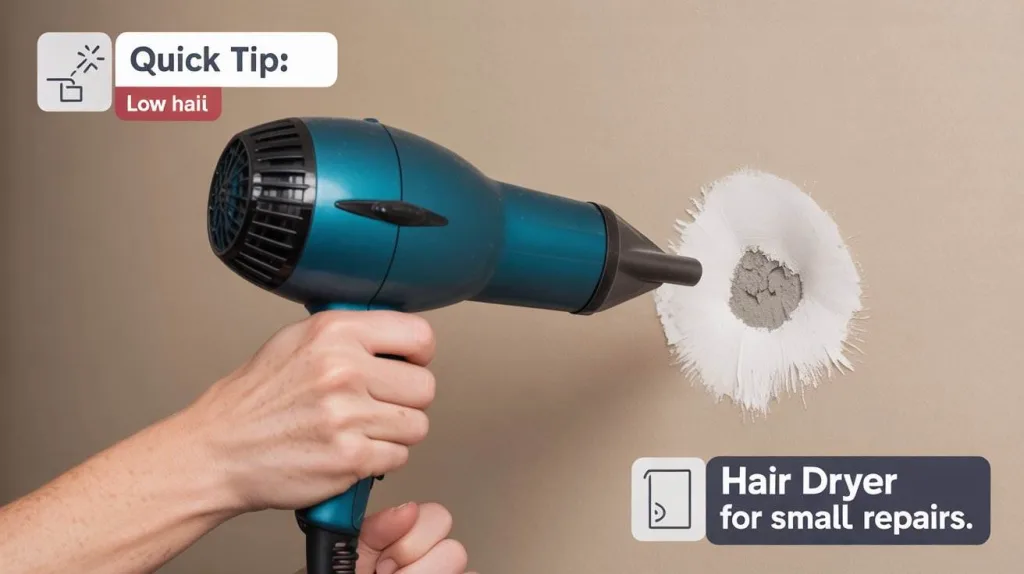
Use a Hair Dryer or Heat Gun Carefully
Several Reddit users swear by this method. One contractor mentioned using a hair dryer or even a heat gun to dry edges faster before sanding. The key is distance keep the heat source at least a foot away and move it constantly to avoid overheating the surface. Too much heat in one spot can make the outer layer dry instantly but leave the inside wet, leading to cracking later.
A hair dryer actually works better than a heat gun because it blows air as well as heat, which aids evaporation.
Mix With Warm Water
If you’re using powdered spackle, mixing it with slightly warm water can make it set a bit quicker. One Reddit tip even suggested adding a pinch of plaster of Paris or salt to accelerate curing but only for small repairs. Additives can change texture and may shorten working time drastically, so experiment cautiously.
Add Gentle Heat to the Room
A mild increase in temperature (say from 65°F to around 75°F) can noticeably reduce spackle drying time. If your room is humid, pair that with a dehumidifier to draw out excess moisture. Dry, circulating air will outperform heat alone.
Use Quick-Dry or Fast-Setting Compounds
Manufacturers like DAP, 3M, and USG make products formulated specifically for faster results. Look for labels like “fast drying joint compound” or “quick set spackle.”
- 3M Patch Plus Primer and DAP Fast Dry can be sanded within an hour.
- Durabond 5 or 20 are favorites among pros; the number refers to the approximate setting time in minutes.
If you’re budgeting for a larger project, check our guide on the cost to repaint a bathroom to plan ahead before you start.
Spot-Dry Small Repairs
For nail holes or tiny patches, a hair dryer on low heat for 5–10 minutes can dry them enough for sanding. Just be patient with larger repairs, forcing them too quickly can make the outer crust lift or crack.
Keep the Room Dry
If the weather’s humid, close the windows and run an AC or dehumidifier. A dry room makes a massive difference in spackle fast drying. On the other hand, if the air outside is dry, open a window to encourage cross ventilation.
By following these tips, you’ll not only get drying spackle faster but also ensure it cures evenly and bonds properly to the wall. The goal isn’t just speed, it’s achieving a strong, smooth surface that looks like the hole was never there in the first place.
Creating the Ideal Conditions for Faster Drying
Once you’ve applied spackle and smoothed it out, the environment around it plays a huge role in how fast it dries. Even the best techniques won’t help much if the room conditions aren’t right.
Think of spackle as a material that needs to breathe. The more balanced your air temperature, humidity, and circulation are, the faster and more evenly it will dry. Here’s how to create those ideal conditions.
Control the Temperature
Warm air speeds evaporation, but that doesn’t mean you should crank the thermostat. The sweet spot is around 70–75°F (21–24°C). Anything higher can cause the top layer to dry too fast while the inside stays wet.
If you’re working in a cold space, use a small space heater but don’t point it directly at the patch. The goal is to warm the room, not bake the wall. Consistent, ambient warmth will shorten spackle drying time without risking cracks.
Reduce Humidity
Humidity is the biggest enemy of spackle fast drying. Moist air slows evaporation, sometimes doubling drying times. If it’s humid or rainy, close windows and use a dehumidifier or your AC’s “dry” mode.
A Reddit user put it best: “Fans and a dehumidifier do the trick every time.” According to the U.S. Environmental Protection Agency (EPA), proper ventilation not only reduces humidity but also improves indoor air quality during home repairs helping spackle dry faster and more evenly.
Improve Airflow
Stagnant air keeps moisture trapped around your patch. You don’t need a gale-force wind just steady movement. A ceiling fan, box fan, or even an oscillating fan on low will keep air circulating evenly.
Position the fan to blow across the wall, not directly into the wet spot. Too much pressure can create ripples or dust on the surface.
For more on why fresh air matters during home projects, read Are Paint Fumes Dangerous? for safety tips and ventilation advice
Avoid Damp or Rainy Weather
If you’re doing wall repairs near open windows, close them on humid or stormy days. Even the moisture in the air outside can affect spackle drying out. For exterior work or unheated spaces like garages, choose dry, mild days whenever possible.
Use the Right Product for the Job
Sometimes, achieving fast drying isn’t about tricks, it’s about product choice. A fast drying joint compound or quick dry spackle is formulated to set faster under almost any conditions. These contain compounds that react chemically rather than relying solely on evaporation, which is ideal when working in challenging climates.
The Risks of Drying Spackle Too Quickly
It’s tempting to blast a heat gun or space heater right at the patch when you’re short on time, but overdoing it can cause more harm than good. Here’s why patience still matters.
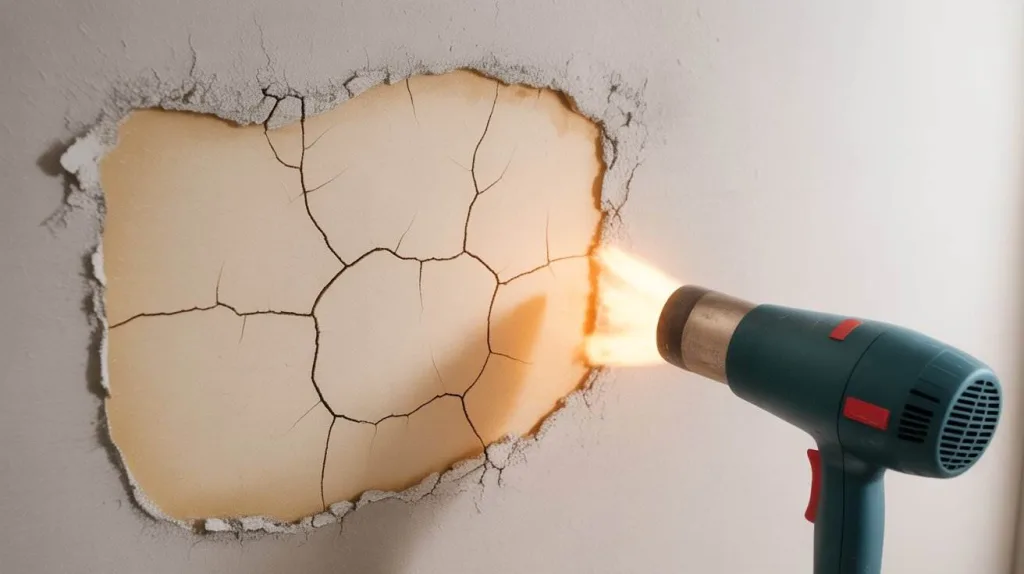
Cracking and Shrinking
When the outer layer dries before the inside does, it creates tension between the two surfaces. The result? Cracks or visible seams that ruin your finish. This is especially common if you’re using quick set spackle or applying a thick patch in one go.
If you notice hairline cracks after drying, lightly sand the surface, reapply a thin coat, and let it cure naturally before painting.
Soft or Unstable Core
Forced drying can make spackle look solid on the surface while the core stays damp. You’ll find out too late, usually when sanding, because it will start to crumble or peel. Always check by gently pressing a fingertip to the center of the patch. If it feels cool or slightly soft, it’s not ready yet.
Peeling Paint and Poor Adhesion
Painting too soon is one of the most common rookie mistakes. If moisture is still trapped, the paint layer won’t stick properly, leading to bubbling or flaking. Even if you’re using fast drying joint compound from Home Depot or DAP Fast Dry products, give them enough time to cure internally before painting.
Spackle Drying Out Unevenly
If you mix your own powdered spackle and leave it uncovered while working, it can start drying out in the container faster than on your wall. This changes the consistency and can make application harder. Keep your mix covered when not in immediate use, and only make small batches at a time.
Discoloration or Surface Roughness
Overheating spackle with a blow dryer or heat gun can slightly scorch it, leaving yellowish spots or an uneven texture. These will show through paint later. The solution: gentle airflow, not direct heat.
When it comes to drying spackle faster, the goal isn’t to rush it’s to control. The perfect balance of temperature, humidity, and airflow lets you speed up the process without compromising the finish. Whether you’re patching a small nail hole or repairing a larger section of drywall, even drying ensures the surface looks flawless once you paint.
Best Products for Fast Spackle Drying
If you’re tired of waiting hours for your walls to dry, it’s worth trying products made specifically for faster results. Here are some of the most reliable and well-reviewed options:
- 3M Patch Plus Primer – A favorite for small jobs. It dries in about 30 minutes and doesn’t require a separate primer coat before painting. Many pros cite 3M spackle dry time as one of the quickest available.
- DAP Fast Dry Premium Spackling – Ready to paint in as little as 15 minutes. Ideal for shallow nail holes and quick touch-ups.
- Durabond 5 / Durabond 20 – These setting-type compounds are used by contractors who want strong, fast results. The numbers indicate the approximate drying time in minutes.
- Fast Drying Joint Compound (Home Depot) – Several Home Depot brands carry “Fast Set” versions that dry faster than traditional joint compounds. Look for labels like “hot mud” or “20-minute setting.”
- Quick Set Spackle – Found at most paint supply stores, this is perfect for patching before a same-day paint job.
When comparing products, consider your project size and environment. For small touch-ups, fast-drying formulas are unbeatable. For large wall repairs, a standard compound might still be the safer bet for a smooth, crack-free finish.
Pro Tips for Flawless, Fast-Drying Spackle Repairs
Drying spackle faster is great, but speed only matters if the finish looks seamless. Once the patch is dry, your goal is to blend it so no one can tell a repair was ever there.
1. Prep the Surface
Clean off dust, grease, or loose paint before applying spackle. For glossy walls, lightly sand first to help adhesion. A clean, textured surface ensures the paste bonds and dries evenly.
2. Apply Thin, Even Coats
Multiple thin layers dry faster and smoother than one thick one. Heavy patches trap moisture and slow even spackle fast drying formulas.
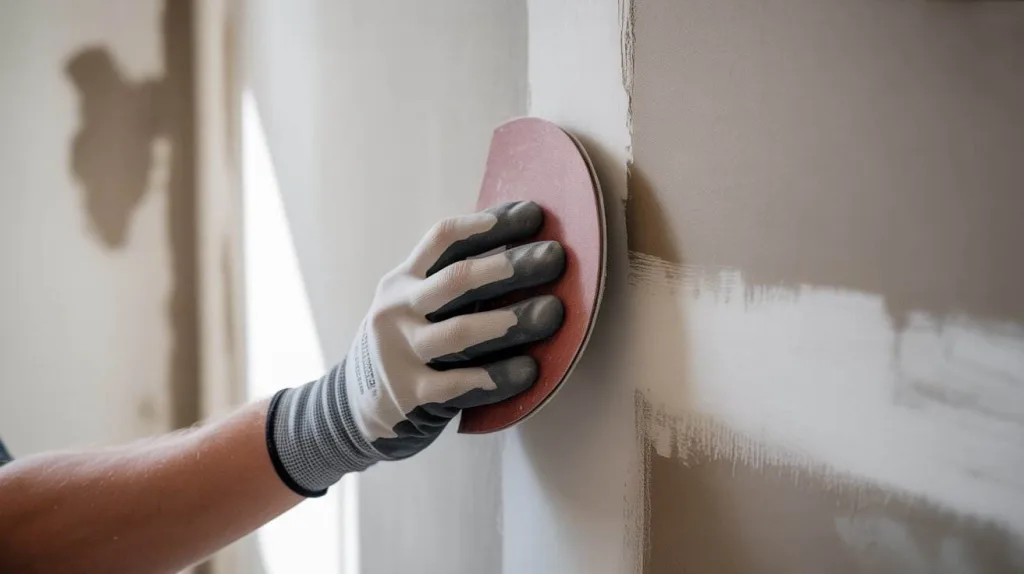
3. Sand Gently
After drying, sand with fine-grit paper (120–220). Use light pressure and repeat if needed. Premixed spackle often shrinks slightly, so an extra coat and light re-sand gives the best finish.
4. Prime Before Painting
Always use primer. Bare spackle absorbs paint unevenly, causing dull spots. A quick coat of primer seals the surface for an invisible repair.
5. Keep Tools and Mix Clean
Wipe knives between passes to avoid gouges. If your compound thickens, stir in a little water spackle drying out is common but fixable.
6. Control Humidity and Temperature
Aim for warm, dry air (around 70°F) and steady airflow. Use a fan or dehumidifier when it’s humid these small steps dramatically improve spackle drying time.
7. Test for Dryness
Tap the patch lightly. If it feels cool or soft, wait longer. Sanding or painting too soon can ruin the surface.
8. Use Quick-Dry Formulas for Small Jobs
When time’s tight, use quick set spackle or fast drying joint compound. Products like 3M Patch Plus Primer, DAP Fast Dry, or Durabond 5 dry in minutes but still cure strong.
9. Store It Right
Press plastic wrap over leftover spackle before sealing the lid to prevent drying out. Properly stored in a cool, dry spot, it’ll last 9–12 months.
10. Be Patient Before Painting
Even fast-drying products need time to cure. Waiting overnight before painting ensures lasting, smooth results.
Wrapping It All Up
Spackling is one of those small tasks that makes a big difference in your home’s appearance. Whether you’re patching a few nail holes or repairing a larger dent, knowing how to control the drying process will help you finish faster and cleaner.
If you remember just three things from this guide, let it be these:
- Apply thin, even layers.
- Control humidity and airflow.
- Be patient between steps.
When you do that, you’ll achieve a professional-quality finish that lasts and you’ll master the art of drying spackle faster the right way.
The next time you reach for that tub of DAP or quick set spackle, you’ll know exactly what to expect and how to make it work in your favor. A little extra attention to conditions, product choice, and drying habits saves time, energy, and frustration.
Spackling may seem simple, but it’s one of those skills where doing it right once can save you from redoing it twice. So take your time, trust the process, and let each coat dry naturally. Before you know it, you’ll have perfectly smooth, paint-ready walls no visible patches, no uneven texture, and no waiting forever.
That’s the real secret behind spackle fast drying not rushing, but mastering control.
If you’d rather skip the DIY hassle, you can always book professional interior painting services to handle prep and finishing for you.
FAQs
Does spackle dry hard?
Yes. When fully cured, spackle forms a solid surface that’s strong enough to support paint and light sanding. Some lightweight versions stay slightly softer for flexibility, but they still finish hard to the touch.
How long does spackling last?
Unopened, it can last over a year. Once opened, store it properly and you’ll get around nine months of usable life before it begins to thicken or lose performance.
Can I add water to spackle that’s thickened or dried out?
Yes, but only if it hasn’t hardened completely. Add a tablespoon of clean water at a time and stir thoroughly. This trick works best for premixed spackle that’s just beginning to stiffen.
How long does it take spackle to dry before sanding or painting?
Light coats may be ready to sand in one to five hours. Painting should wait at least 24 hours unless you’re using a quick dry spackle or fast drying joint compound designed for shorter curing times.
What’s the difference between premixed and powdered spackle?
Premixed versions are ready to use and great for small home repairs. Powdered spackle (also called setting compound) is mixed with water and can dry much faster depending on the ratio you use.
Should I use a primer over spackle?
Definitely. Primer seals the patch and helps your paint match the surrounding wall’s texture and sheen.
Can spackle be used on ceilings or just walls?
It works for both, but apply thinner layers overhead to avoid sagging.
What’s the best way to speed up drying without damaging it?
Thin coats, good airflow, and low humidity are your best tools. A hair dryer on low heat can help small spots, but always keep it moving.