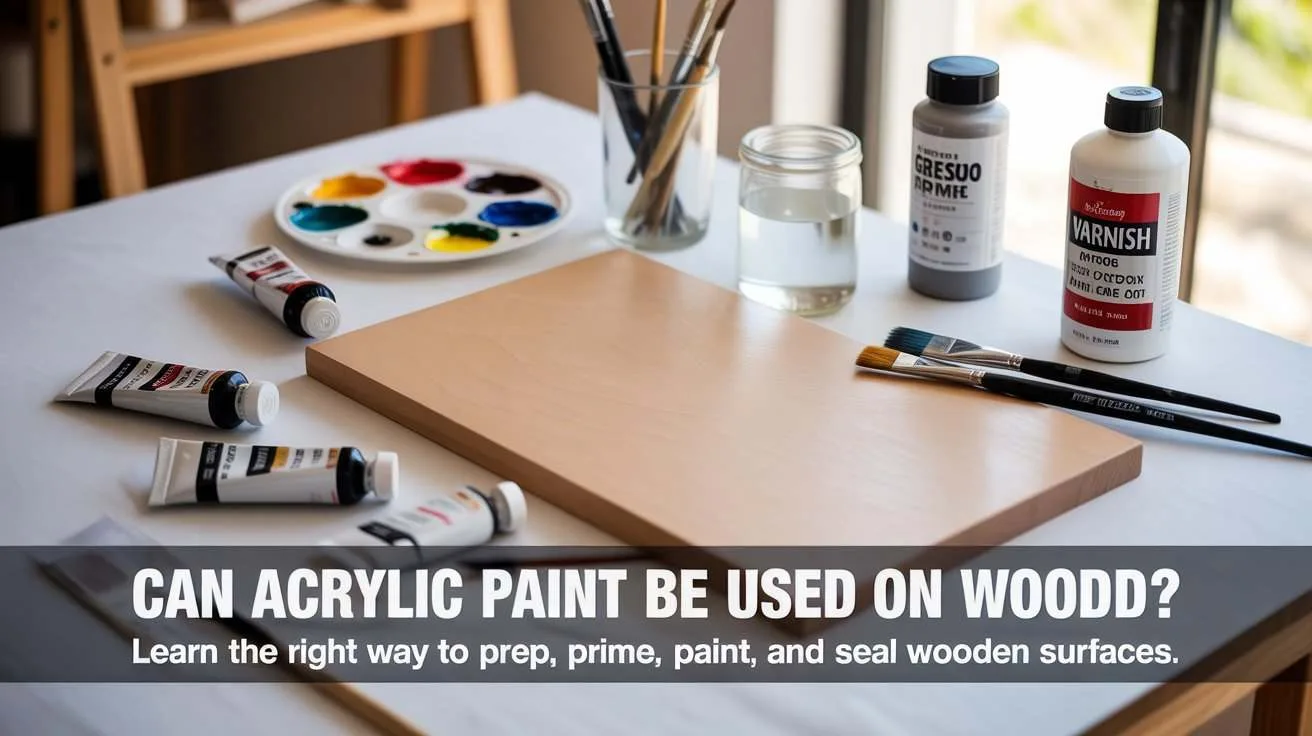
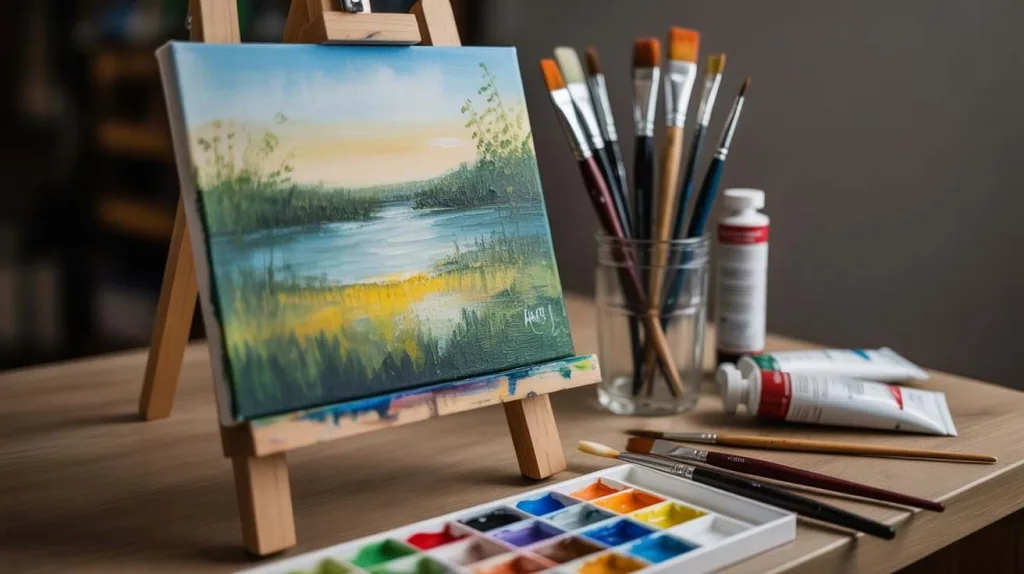
If you’ve ever wanted to paint a wooden sign, restore furniture, or create art on a panel, you might wonder — can acrylic paint be used on wood?
Yes, absolutely. Acrylic paint works beautifully on wood when the surface is properly prepared. The key steps are simple but crucial: clean, sand, prime, paint in thin layers, and seal.
Skip any of them and you’ll likely end up with peeling paint, uneven color, or a tacky finish that never quite cures.
Before diving into technique, let’s look at the quick facts.
Quick Answer
Acrylic paint sticks to most wood surfaces — raw, treated, or primed — as long as they’re clean and dry.
Here’s the correct order for long-lasting results:
- Clean: Remove dust and grease with mild soap and water.
- Sand: Smooth the surface (150 → 220 grit) so paint grips evenly.
- Prime: Apply 2–3 thin coats of acrylic gesso or bonding primer.
- Paint: Use thin, even layers; let each one dry before adding the next.
- Seal: Finish with a clear acrylic varnish or polyurethane for protection.
For outdoor projects, use an exterior-rated sealer and plan to refresh it every year or so.
If you’ve worked with deck or siding wood before, this process will feel familiar — similar to what we cover in our guide on painting pressure treated wood.
Pros and Cons of Acrylic on Wood
Pros
- Fast-drying & easy cleanup: Acrylics dry within minutes and clean up with water.
- Bright, flexible color film: The paint flexes slightly with temperature changes, preventing cracks.
- Versatile: Works on MDF, birch, plywood, and even old furniture.
- Low-odor: Great for indoor projects and craft rooms.
Cons
- Can feel sticky if not cured properly. Thick coats or humid rooms slow drying.
- Less resistant to solvents or abrasion than oil paints unless sealed.
- Needs priming and sealing for best adhesion and moisture control.
If you store leftover paint after a project, make sure it’s still usable — our article Can Paint Go Bad? explains how to tell when acrylics or house paints have expired.
Best Wood Surfaces (and What to Avoid)
Acrylic paint can adhere to almost any wood surface, but not all woods behave the same.
Some provide a smooth, even base that makes painting effortless, while others require extra work to prevent stains, bleeding, or peeling.
Here’s how to choose the right type of wood for your project.
Best Woods for Acrylic Painting
MDF (Medium Density Fiberboard)
MDF is one of the best surfaces for acrylic painting because of its flat, smooth texture and consistency. It doesn’t have knots or visible grain, making it perfect for detailed artwork and flat color fields. Be sure to seal the edges before priming so moisture can’t seep in.
Birch Plywood
Birch is a popular choice among professional painters. It’s strong, dimensionally stable, and resists warping when both sides are sealed. It’s ideal for artists who want a balance of durability and fine surface quality.
Basswood
Lightweight and smooth, basswood accepts acrylic paint easily. Its even grain and pale tone make colors appear vibrant and true to their mix. It’s a great choice for craft projects, models, and decorative art.
Pre-Made Wood Panels
Ready-made panels sold at art supply stores are already sanded, sealed, and cradled (framed at the back). They’re an excellent option if you want to skip preparation and start painting immediately.
Woods That Need Extra Preparation
Softwoods (Pine, Spruce, Fir)
Softwoods are affordable but tend to have resin pockets and knots. These can bleed through acrylic paint if not sealed. Apply a shellac-based knot sealer before priming and add two or more thin layers of acrylic gesso for a stable surface.
Oily Woods (Teak, Ipe, Mahogany)
Oily hardwoods resist water-based products like acrylic paint. Wipe the surface with rubbing alcohol or acetone to remove surface oils, then use a bonding primer to help the paint adhere properly.
For Outdoor Projects
If you’re painting wood for exterior use—like garden art, signage, or outdoor furniture—choose exterior-grade plywood or cedar.
These woods hold up better against moisture, temperature shifts, and UV exposure. Always prime and seal both sides, including edges and back panels, to prevent warping.
Finish with a clear outdoor sealer for UV and water protection.
For more detailed outdoor preparation steps, see our guide on painting pressure-treated wood.
Surface Preparation (Clean, Sand, Seal, Prime)
Surface prep is the difference between a smooth, lasting finish and a patchy, peeling mess.
Even the best acrylic paint won’t perform well on dusty, oily, or rough wood. Proper preparation helps the paint bond evenly, prevents discoloration, and ensures your piece lasts for years.
1. Clean the Surface
Start by removing any dirt, grease, or old finish.
Wipe the wood with a damp cloth and a drop of mild dish soap, then rinse with clean water.
Avoid soaking the surface — you just want to lift dust and residue, not saturate the wood fibers.
Let the wood dry completely before sanding.
If you’re repainting or working with old furniture, make sure to remove any wax or oil residues with rubbing alcohol or a degreaser.
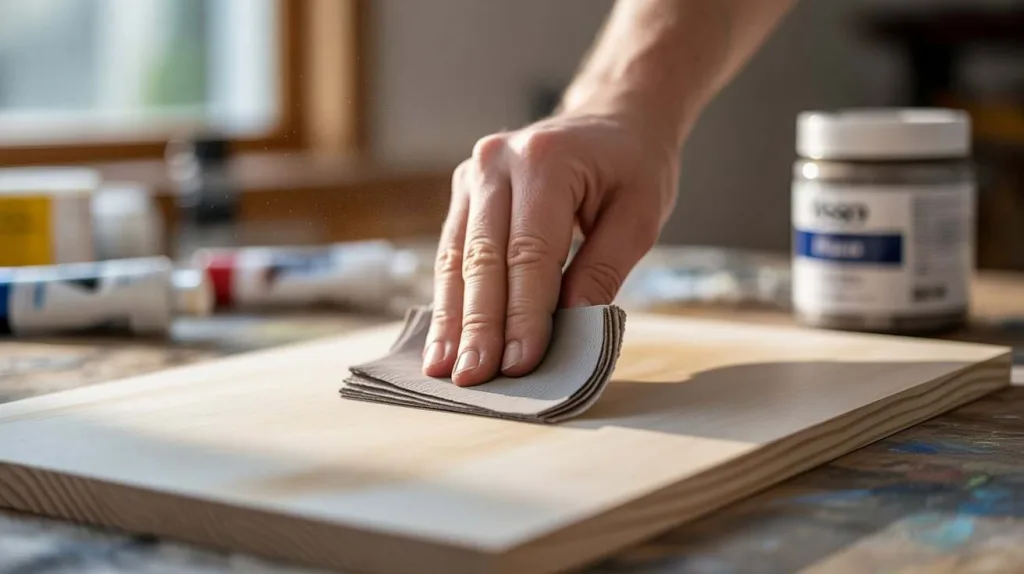
2. Sand the Wood
Sanding smooths the surface and opens up the grain so the primer can adhere properly.
Use 150- to 180-grit sandpaper to level rough areas, then finish with 220-grit for a fine, even texture.
Always sand with the grain, not against it.
Once finished, wipe away dust with a tack cloth or clean microfiber cloth.
Well-sanded wood not only feels better to paint on but also prevents brush marks and uneven absorption.
3. Seal or Size the Surface (Optional but Recommended)
Although this step is often skipped, sealing your wood makes a big difference in longevity.
Apply a thin coat of acrylic medium or PVA glue diluted with a bit of water.
This blocks natural acids from the wood that can cause Support-Induced Discoloration (SID) and stops the paint from soaking too deeply into the fibers.
Be sure to seal the front, back, and edges of wood panels. Fully sealed panels resist warping and help your paint layers stay flexible over time.
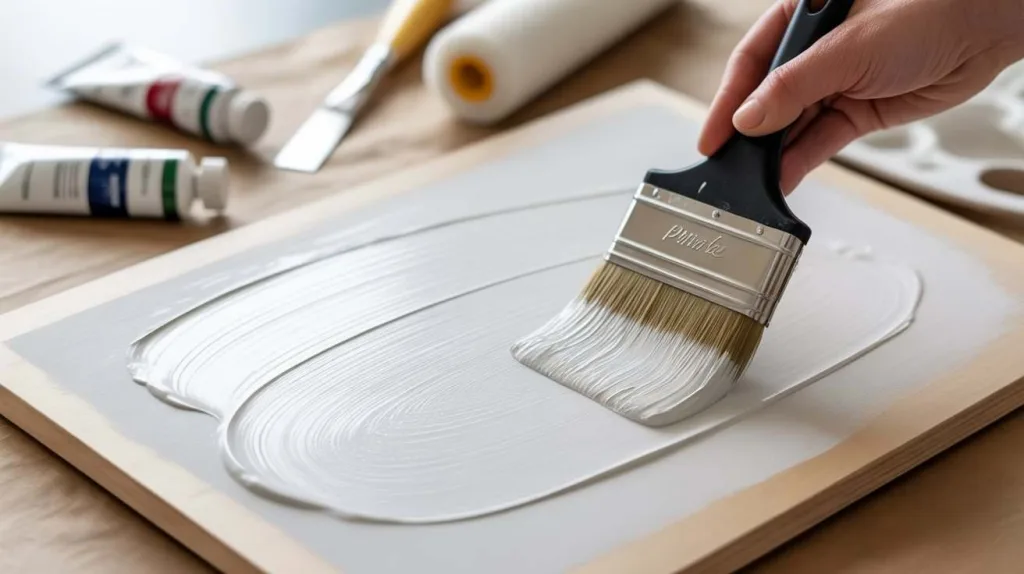
4. Prime the Wood
Once sealed, apply acrylic gesso — the foundation for any good paint job.
Gesso evens out absorbency and creates a surface with just the right amount of tooth for paint to grip.
Apply two to three thin coats using a wide brush or foam roller.
Allow each layer to dry fully before applying the next, and lightly sand between coats for a perfectly smooth finish.
For problem areas — like knots or stains — use a stain-blocking primer or shellac-based primer before your gesso. This extra step prevents tannin bleed-through and gives you a clean, white surface to start painting on.
When you’re done, your wood should feel smooth but slightly matte to the touch — ready for painting.
This preparation stage may take an hour or two, but it guarantees that your acrylic paint will adhere properly and stay vibrant over time.
If you’re curious about how surface texture changes color appearance, see our guide on what is paint opacity or transparency.
Paint Application (Flawless Finish)
Once your wood is cleaned, sealed, and primed, the fun part begins — painting.
Acrylic paint can be applied in many ways, but technique and patience make the difference between a smooth, professional finish and one that looks uneven or sticky.
Choose the Right Materials
You can use almost any acrylic paint on wood, from heavy-body paints (great for texture and impasto) to fluid acrylics (ideal for thin coats or detailed work).
For craft and decorative projects, even student-grade acrylics perform well if properly sealed afterward.
Recommended tools:
- Soft synthetic brushes for smooth coverage
- Foam brushes or mini rollers for flat, even areas
- A small detail brush for edges and fine lines
Keep a clean cup of water nearby to dampen your brush occasionally. A slightly moist brush helps acrylic glide smoothly without dragging or leaving marks.
How to Apply Acrylic Paint on Wood
- Thin is better than thick.
Apply thin, even coats instead of one heavy layer. Thick paint can trap moisture and lead to tackiness or cracking. - Let each coat dry completely.
Most acrylics are dry to the touch in 20–60 minutes, but dense colors or humid rooms may take longer. - Avoid overworking the surface.
Rebrushing half-dry paint leaves streaks and uneven texture. If you miss a spot, wait for the layer to dry, then go back. - Build your layers.
Acrylics dry fast, so layering is simple. Start with a mid-tone base and add highlights or details once dry. - For large, flat areas:
Roll the paint on with a foam roller, then lightly “tip off” with a brush while wet to remove roller texture.
Drying vs. Curing
Acrylic paint dries fast but takes time to cure fully.
“Dry to touch” means water has evaporated from the surface, but deeper layers may still be soft.
Curing can take a few days to a week, depending on paint thickness and humidity.
Before applying varnish or using the painted object (especially furniture), allow full curing.
Sealing too soon is one of the main causes of tacky, sticky finishes — a common complaint among beginners.
If you notice slow drying or stickiness, make sure your paint isn’t old or spoiled. Our guide on can paint go bad explains how age and temperature can affect acrylic performance.
Finishing Touches
For a smoother, professional look:
- Lightly sand between coats using 400-grit sandpaper once the layer is dry.
- Wipe away any dust before applying the next coat.
- Finish with one final, thin layer to even out color and sheen.
When you’re satisfied with the paintwork, let the entire piece cure at least 72 hours before sealing or heavy handling.
Sealing, Varnishing & Problem Fixes (Indoor vs Outdoor)
Acrylic paint is durable on its own, but sealing it adds the protection your work needs to last — especially for furniture, outdoor pieces, or high-traffic decor.
The right varnish keeps colors bright, resists moisture, and prevents scratches or fading over time.
Indoor Finishes
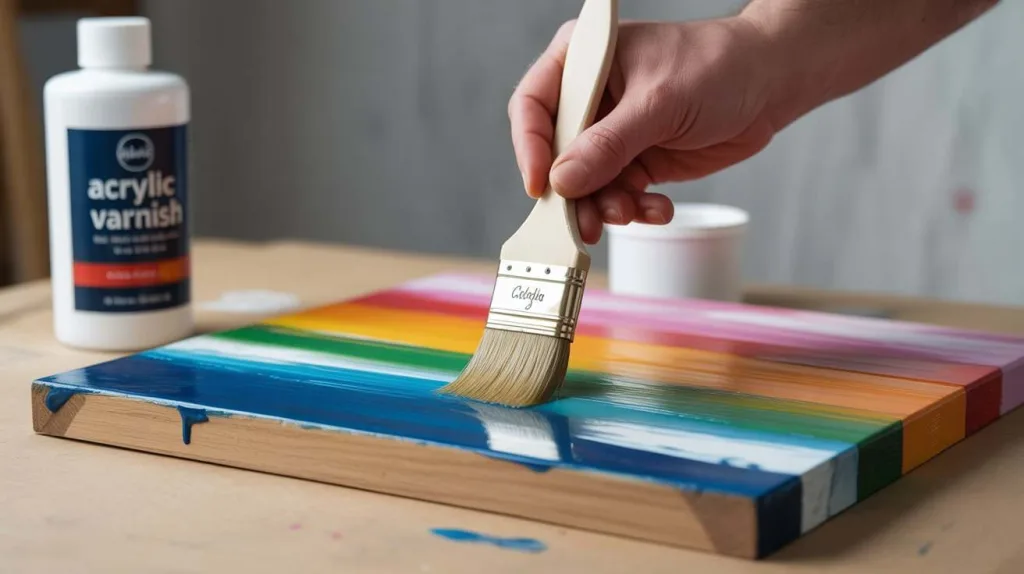
For interior projects like wall art, furniture, or crafts, use a clear acrylic varnish.
These come in different sheens — matte, satin, and gloss — depending on the finish you want.
How to apply:
- Let your painted surface cure for at least three days.
- Apply a thin layer of isolation coat first (a mix of acrylic gel medium and water). This creates a barrier so the varnish can later be removed or refreshed without damaging the paint.
- Once dry, brush or spray on two to three thin coats of acrylic varnish, allowing full drying time between each.
For most indoor work, water-based acrylic varnishes are enough to protect the surface while keeping the natural look of the paint.
Outdoor and High-Wear Projects
If your piece will live outdoors or face heavy use, step up your protection.
Use a spar urethane or exterior-grade clear coat designed for UV and water resistance.
Outdoor sealing steps:
- Make sure the paint is fully cured (ideally 5–7 days).
- Apply two to three light coats of clear sealer, covering edges, corners, and the back of the panel.
- Allow 24 hours between coats for best adhesion.
Inspect outdoor pieces every 6–12 months. When the surface starts to look dull or worn, lightly clean it and reapply a new coat of sealer.
That simple maintenance routine can extend the life of your painted wood by years.
Using Polyurethane Over Acrylic Paint
You can apply polyurethane over acrylic paint — just make sure the acrylic is fully cured and the surface is clean.
- Water-based polyurethane keeps colors true and resists yellowing.
- Oil-based polyurethane adds warmth but can slightly darken or amber the paint.
Always test on a small area first, and apply with a synthetic brush or foam applicator in thin, even layers.
If you’re unsure which to choose, our related post on can you put polyurethane over alkyd paint explains how clear coats interact with different paint types.
Common Acrylic-on-Wood Problems (and How to Fix Them)
Sticky or Tacky Finish
If the surface feels sticky days after painting, the paint likely wasn’t cured or the varnish trapped moisture.
Move it to a dry, ventilated area for a few days, then lightly sand and reapply a fresh coat of clear varnish.
Peeling or Flaking Paint
Usually caused by poor prep or no primer.
Sand the area smooth, apply a bonding primer, and repaint in thin layers.
Visible Grain or Bubbles
This happens when the surface wasn’t sanded or sealed properly.
Sand lightly and apply another thin layer of gesso or acrylic medium before repainting.
A well-sealed acrylic piece doesn’t just look better — it lasts longer.
Whether it’s a small indoor decor item or a painted outdoor sign, sealing is your final insurance against fading, scratches, and peeling.
If you’d like to see how surface texture affects light reflection and color, check our article on the best surfaces for acrylic painting.
Conclusion
Acrylic paint can absolutely be used on wood — and when you prepare the surface properly, it can last for years indoors or out.
The key is simple: clean, sand, prime, paint in thin layers, and seal. Those five steps make the difference between a quick craft and a durable, professional finish.
For practice or indoor decor, acrylics are one of the easiest ways to transform any wooden surface with color and texture. And if you’re working on furniture or outdoor projects, a little extra prep and a reliable sealer will keep your work looking fresh season after season.
To learn more about surface options, see our full guide on the best surfaces for acrylic painting.
Or, if you’re curious about paint care and storage, check out how long paint lasts and can paint go bad — both cover how to keep your materials in top shape between projects.
FAQs
1. Do you need to prime wood before painting with acrylics?
Yes. Bare wood absorbs paint unevenly, which can cause blotches and weak adhesion. Applying two or three coats of acrylic gesso gives you a smooth, sealed surface that holds color evenly.
2. Can you paint directly onto wood without primer?
You can, but expect duller colors and a shorter lifespan. Raw wood drinks in acrylic paint, so priming helps preserve vibrancy and durability.
3. How do you prep wood for acrylic paint?
Clean the wood, sand it smooth, seal the edges with PVA or acrylic medium, and apply gesso primer. This stops stains and moisture from damaging your paint.
4. What are the disadvantages of acrylic paint on wood?
Without proper prep, acrylic paint can peel, feel sticky, or absorb unevenly. It’s also less resistant to moisture and abrasion than oil-based finishes unless sealed with a clear coat.
5. Can beginners use acrylic paint on wood?
Absolutely. Acrylics are easy to use, fast-drying, and water-soluble. Just make sure to start with a primed surface and work in thin layers for the best results.
6. Can acrylic paint be used on wood furniture or tables?
Yes, but it needs protection. Paint in thin coats, let each one dry completely, and finish with two or three layers of polyurethane or acrylic varnish for daily use.
7. Can acrylic paint be used on wood outdoors?
Yes, if you seal it properly. Use exterior-grade primer and varnish or spar urethane to protect against UV rays and moisture. Re-coat every year for long-term durability.
8. How do you seal acrylic paint on wood?
After the paint cures, apply a clear coat of acrylic varnish or polyurethane. Brush on two to three thin layers, letting each one dry completely for a strong, washable finish.
9. Why is my acrylic paint sticky on wood?
A sticky surface usually means the paint hasn’t cured or was sealed too soon. Give it more drying time in a low-humidity space, then sand lightly and reseal if needed.
10. Can you use polyurethane over acrylic paint?
Yes. Once acrylic paint is fully cured, you can add water-based polyurethane for a clear, protective finish that won’t yellow over time.
11. Can you paint acrylic over stained or varnished wood?
Yes, but scuff-sand the surface first and apply a bonding primer. This helps the paint grip instead of peeling off glossy or sealed areas.
12. How long should you let acrylic paint dry before sealing?
Let it dry for at least 72 hours for light coats and up to a week for thick applications. Rushing this step can trap moisture under the varnish and cause tackiness.